Beginners guide to shooting a 35mm manual film camera
Welcome to a quick guide on how to get started with your new-to-you manual 35mm film camera!
Now there's a lot of variations of film cameras and each of these steps might be subtly different on yours, so if you bought a camera from my shop and you have any questions drop me an email and I'll try to help.
#1 Buying film
I sell some expired film in the shop but I wouldn't recommend this to people starting out, as it's a bit trickier to get good photos from.
Instead, I'd recommend starting with a cheaper colour film, like Kodak Gold 200 or Kodak Color Plus 200. Colour film is quicker and cheaper to get processed than monochrome (black & white) film, and Kodak's colour films are readily available. I'd buy it online from somewhere like Analogue Wonderland, who tend to be affordable.
You are looking for 35mm or 135 film, which can usually be bought in either 24 or 36 exposure rolls. The number in the name of e.g. Kodak Gold 200 is the ISO speed rating of the film, which is covered below.
#2 Loading film
Take your film out of its box and pod, and you'll have an exposed bit of film sticking out of the canister. This is known as the "leader" and is important when loading the camera.
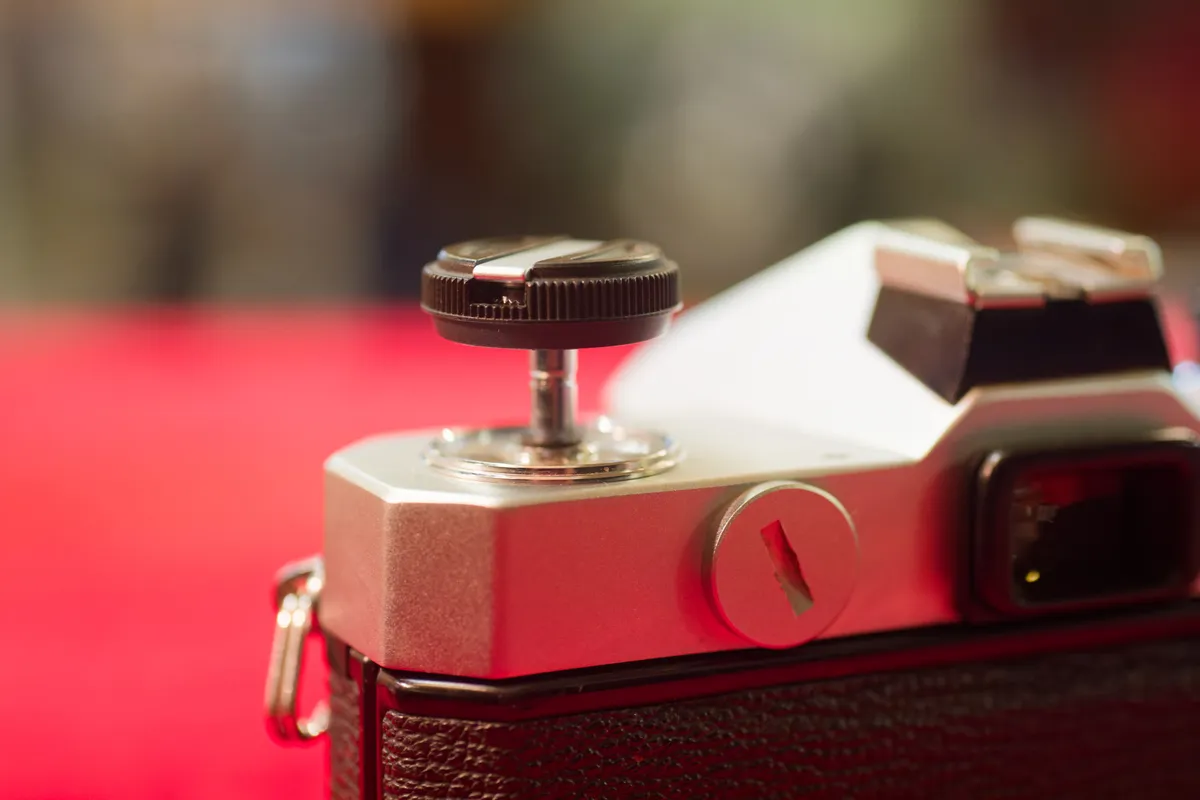
Open the back of your camera. This is most commonly done by pulling up on the film winder:
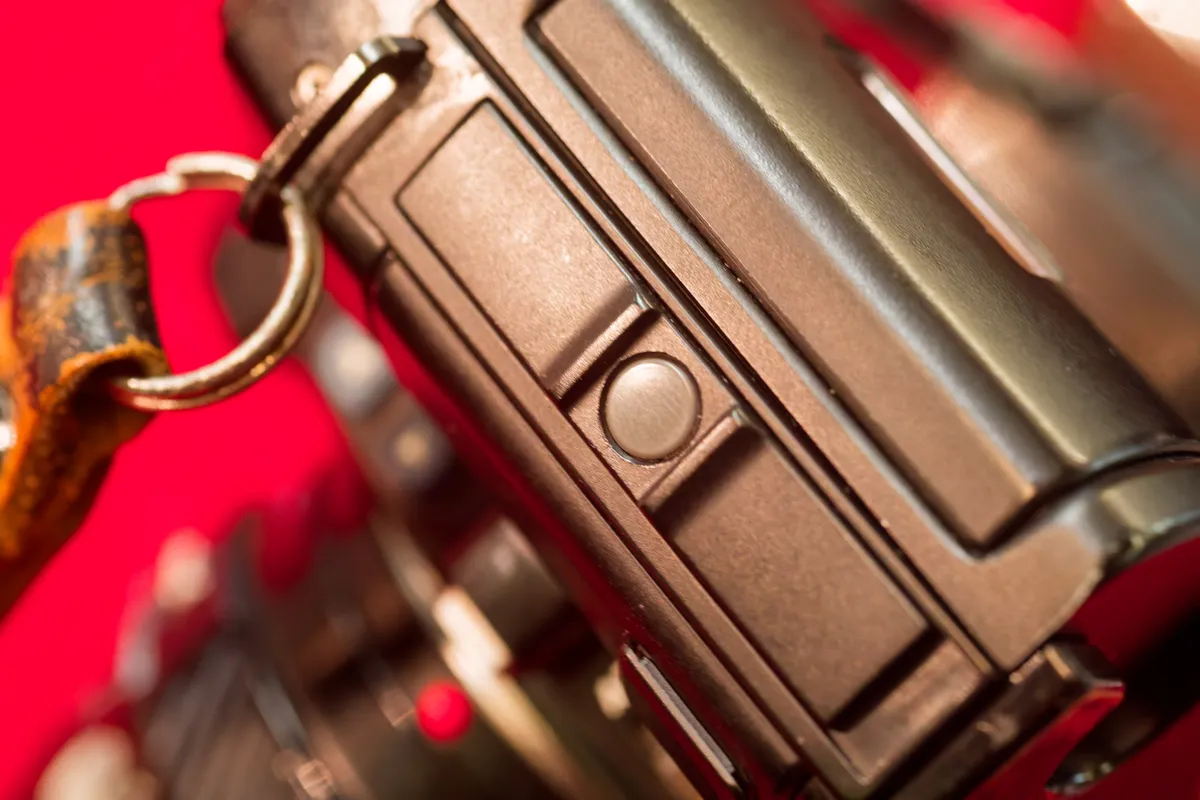
Other cameras feature some sort of latch:
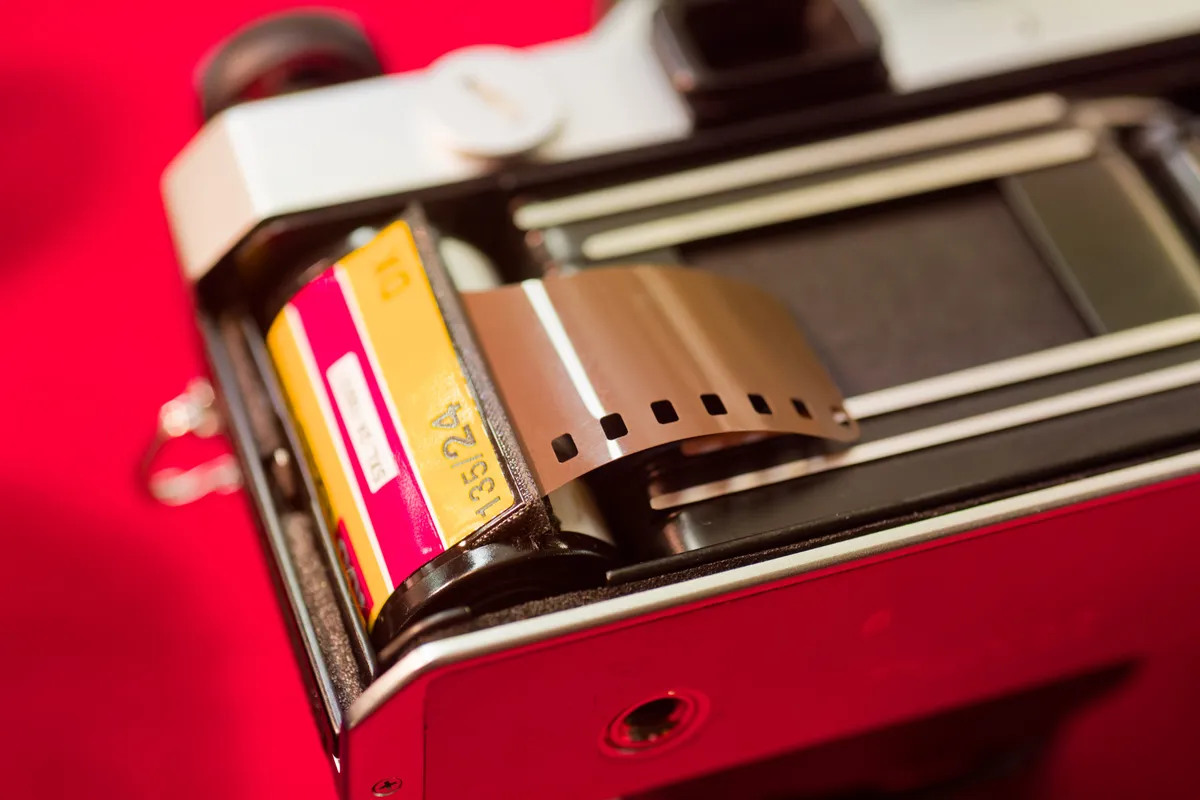
Now the door of the camera is open, we can load the film. Insert the canister into the empty side of the camera with the film leader resting across the back of the camera:
Push the rewind lever back in:
Fully manual cameras
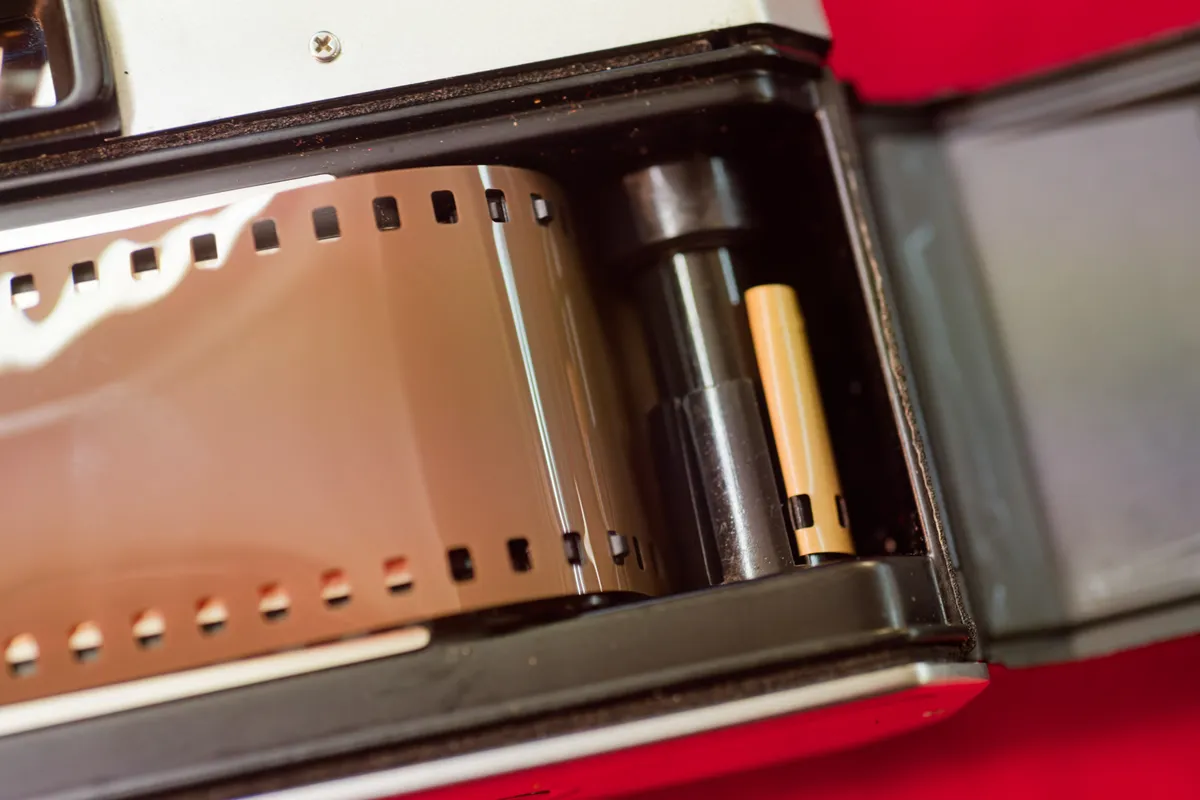
For most older 35mm cameras with manual winding levers, you now need to insert the film leader into the take-up spool. Pull out the film leader until it can reach over to the other side of the camera and insert the leader into the notches on the take-up spool:

If you've done this correctly, you can now crank the wind lever once to ensure the film is hooked in properly:
If the leader falls out, don't panic - press the shutter button once to release the shutter, then try to insert the film leader again and wind on again. Some take-up spools are trickier than others to get it hooked in correctly.
Once that's done, you can close the door of the camera. You now need to wind the film on, which typically requires you to fire the shutter and crank the winding lever 2 times on most cameras. So fire the shutter, wind on, fire the shutter, wind on. The shot counter (usually on the top in a little window) should now be sat on 0 or 1.
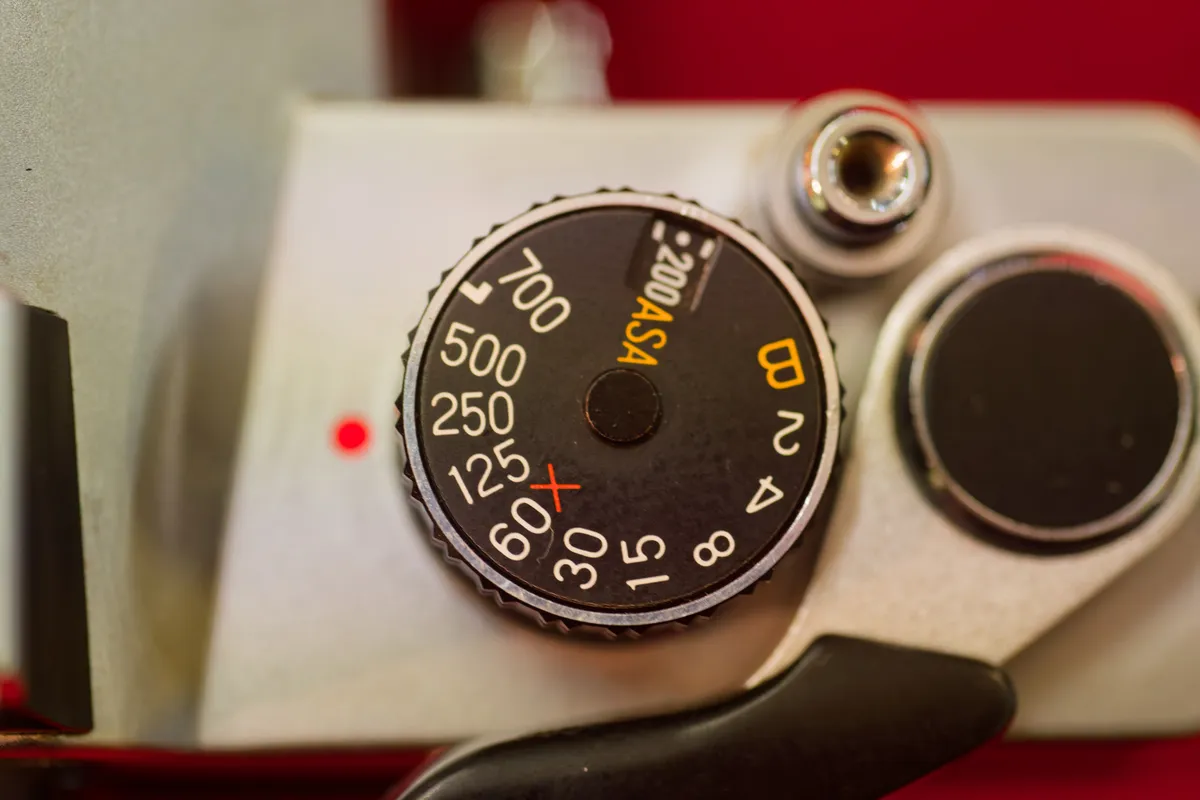
Make sure to set the ISO dial on your camera to the number matching the speed of the film you just inserted, e.g. set it to 200 for 200 ISO film.
Cameras with motor drives/auto winders
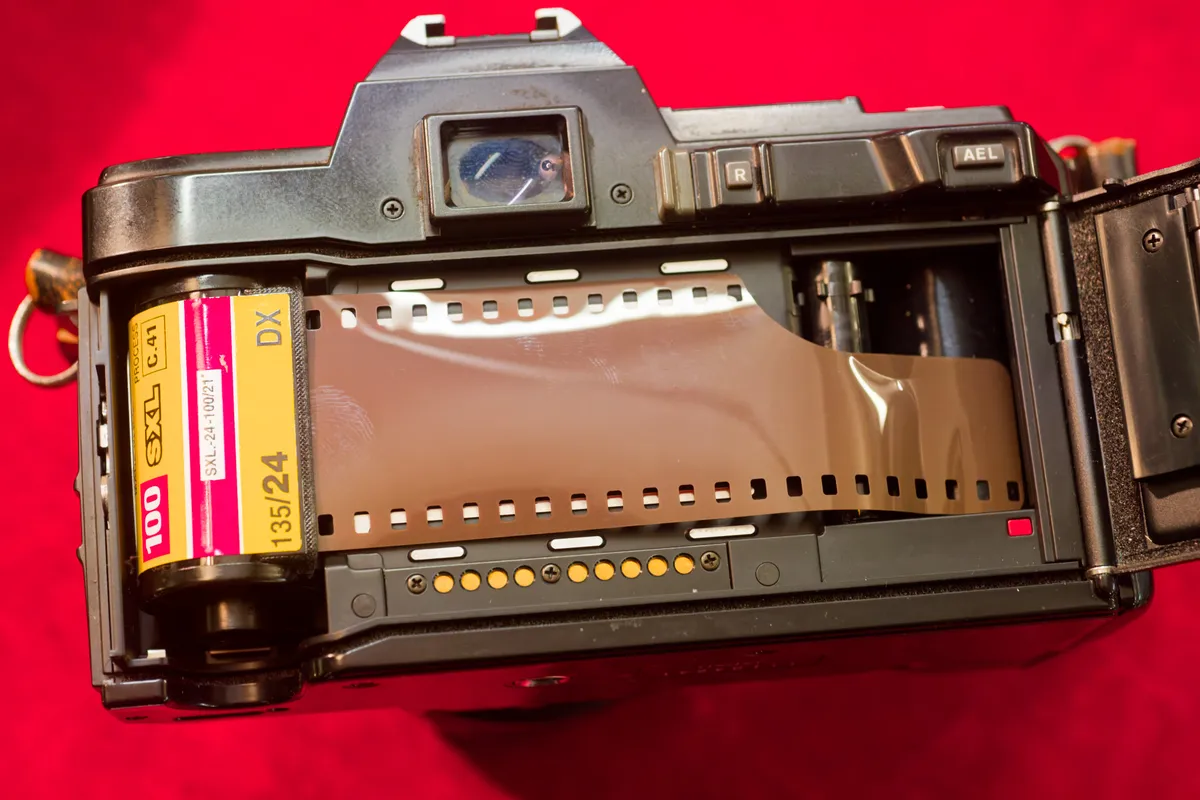
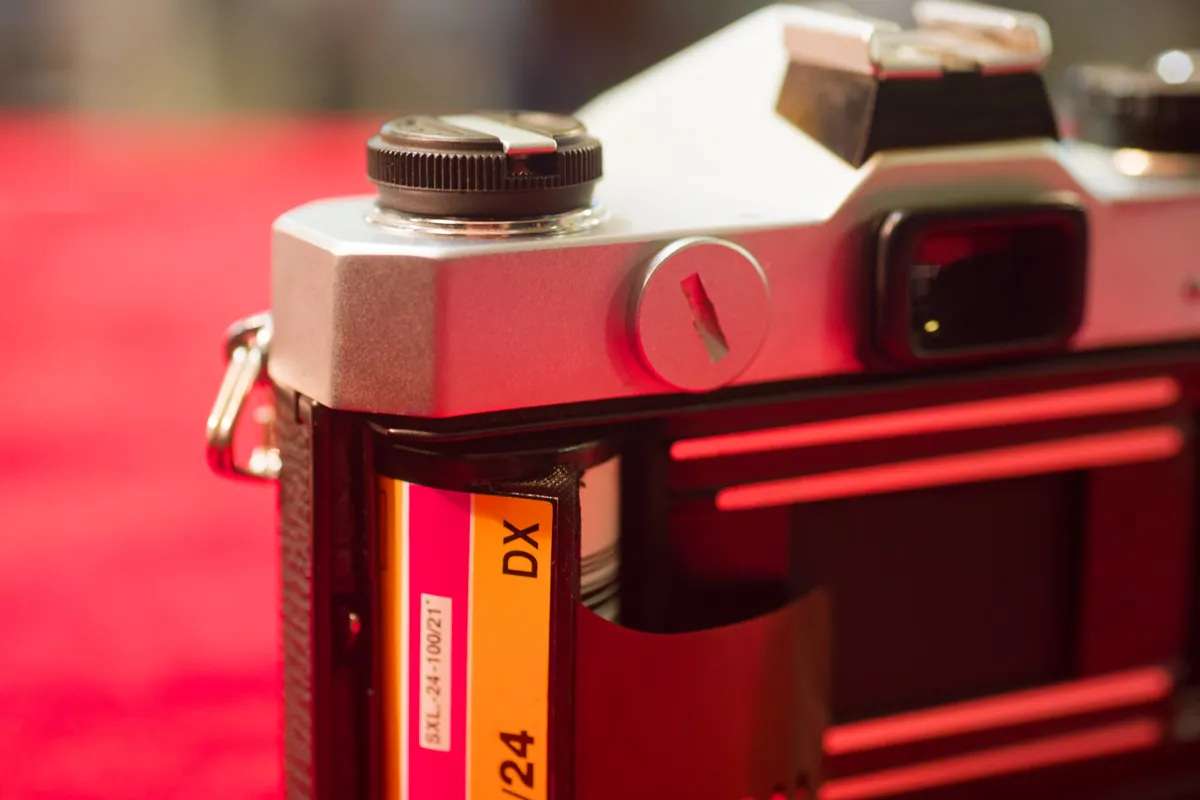
Some more modern 35mm cameras feature an auto-loader, so all you now need to do is pull the film leader across until it sits past the red dot, and then close the door. Some cameras will then immediately make some noise and wind the film on, on others you now need to press the shutter button and it will perform the wind on.
These cameras will usually set the ISO speed of your film automatically using DX codes printed on the canister.
#3 A quick guide to exposure
I'm going to cover the basics of operating a manual camera for taking photos here. Each camera is different so make sure to ask me if you have any questions!
The exposure triangle
There are 3 primary aspects to taking photos, and by changing each one you affect your options for the other two. This is called the Exposure Triangle.
The three aspects are: Shutter Speed, Aperture, and ISO.
Shutter Speed
Shutter speed is how fast the shutter opens and closes. The time it is open is how long the film will be exposed to light for.
This is commonly measured in seconds and then fractions of a second, so 10s, 1s, 1/2, 1/8, 1/60, 1/500 etc. With a standard 50mm lens, 1/60 of a second is typically the slowest shutter speed most people can use without using a tripod.
Your shutter speed affects how blurry moving subjects are. If the shutter speed is slow, moving subjects will be blurry. If the shutter speed is fast, they'll be clearer, but less light will be hitting the film.
Aperture
The aperture refers to the size of the hole through which the light is entering the camera. This is sometimes referred to as an "f-stop", and will often be written as f/1.8, f/2.8, f/4 etc.
The smaller the number, the larger the hole, the more light that is entering the camera.
However the larger the hole, the shallower the depth of field will be. This means that things in front of, or behind, where you are focusing, will be blurry. If you want many things in focus, for example, then you might shoot at f/8. If you want to take a portrait of someone, you might use f/2.8 so the background is blurry.
ISO
The ISO is a standard rating for the light sensitivity of the film. It is also sometimes written as ASA on some camera models. The larger the number, the more sensitive the film is to light. These are the common ISO numbers you'll see:
100, 200, 400, 800
But there are many others as well. As a rough guide, 100 speed film is suited to bright days, 200 and 400 are good "every day" films, and 800 is better for lower light situations.
What are the trade-offs with ISO? Well the higher the number, the more sensitive it is, but the grainier and less detailed it will be also. The lower the number, the more detail you'll be able to capture.
#4 Taking a photo
When taking a photo you need to balance the 3 points of the exposure triangle. Now in film photography, one of them is already fixed - the film speed. If you load 200 ISO film into your camera, you set the camera's ISO dial to that speed and leave it there for the duration of the roll (there are exceptions to this but they're not important right now):
Fun fact: phone cameras have fixed apertures! So phones vary their exposure by adjusting ISO and shutter speed.
All you need to worry about now are Shutter Speed and Aperture, and for each photo you need to balance how fast you want the shutter speed (e.g. to freeze motion) compared to how bright the aperture will be (e.g. to get more things in focus). By changing one you also need to adjust the other.
Most cameras have what's known as a "light meter". This measures the light entering the camera and will either wiggle a needle about or show LEDs inside the viewfinder to tell you whether your exposure is accurate.
By adjusting shutter speed and aperture, this needle will move. Some older cameras might need you to depress a button or lever in order to see the change, but cameras from the 1980s onwards usually don't.
Every camera will show the light meter differently, but common patterns are that you need to match a second needle to the first needle, or there's only one needle and it needs to point in the middle, or there are LEDs and you want to see a green LED rather than a red LED.
#5 Focusing
Most earlier film cameras are optimised for manual focus - this means you need to rotate the focus ring on the lens until your subject is in focus. Different cameras have different focus aids for manual focus.
A common focus screen on manual cameras has a circle in the centre of the screen with a line through it. This is a split prism, and if you place it over a vertical line, like the edge of a wall, it will show that line as two separate parts when out of focus. As you move that line into focus the two parts will come together until they line up - that's now in focus.
You also have a larger circle around the split-prism which will look fuzzy when things aren't in focus. You use this in combination with the split prism to acquire focus.
Later cameras from the 1990s have autofocus, but can be manually focused as well. Most autofocus systems work by you half-pressing the shutter button, where it will autofocus on a point (usually the centre of the image), and then the shutter fires when you fully depress the button.
#6 Taking a photo
Once you're ready, depress the shutter button fully. The camera will make a loud clunk. If the camera has auto-advance it will also make a loud mechanical noise as it winds the film on. If your camera has a manual advance, you now need to use your thumb to wind the advance lever around again - this also cocks the shutter ready for the next photo.
#7 Finishing your roll of film
Once you've finished the roll, the advance lever will no longer let you advance. It's time to rewind the film.
On automatic cameras it will probably do this as soon as you take the last photo, or there's a button to press.
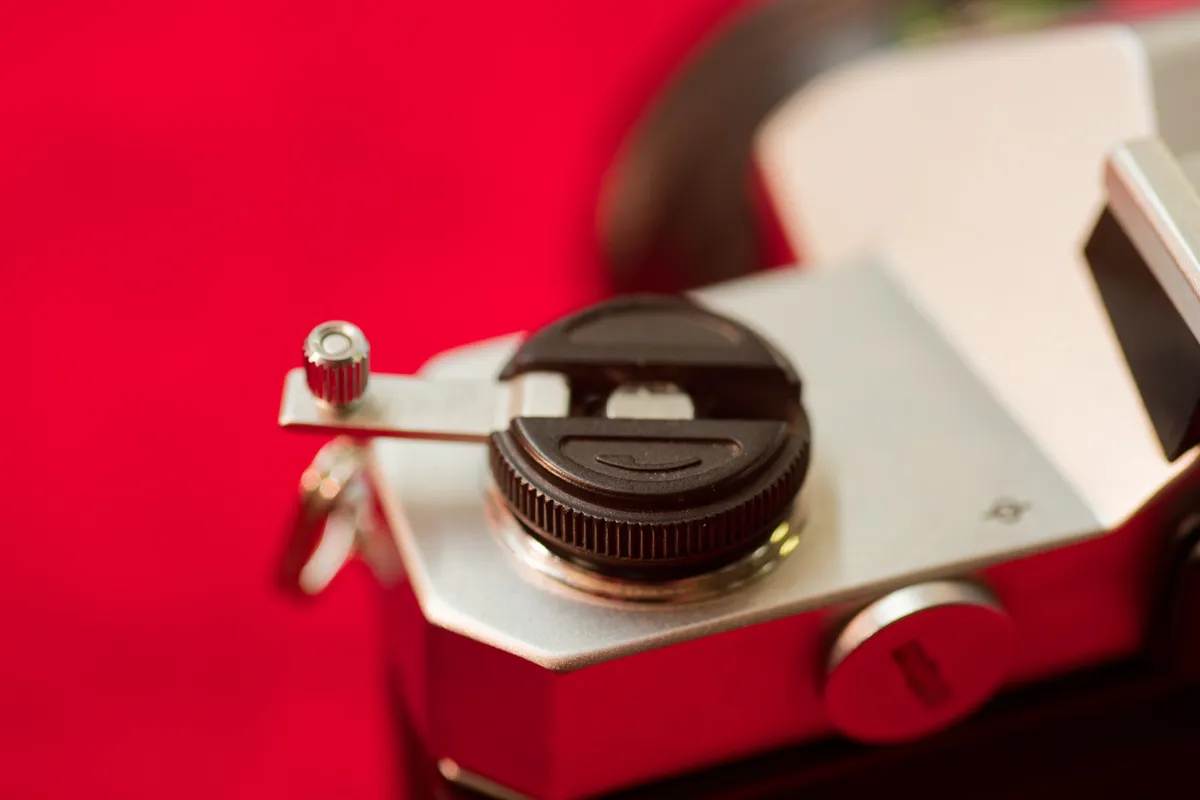
On manual cameras, you most likely need to depress a small button on the bottom of the camera:
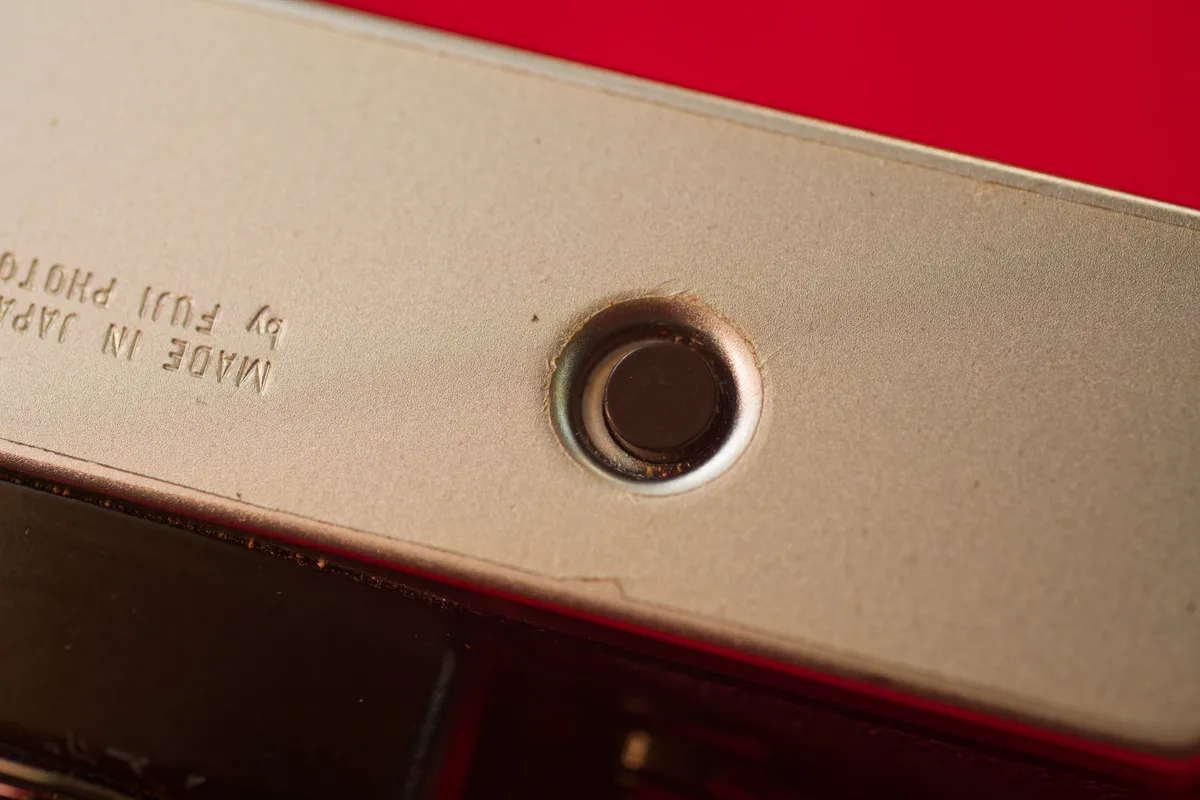
Sometimes these need to be held depressed. You can now rewind the film by extending the rewind lever on the other side of the camera:
Rotate that lever. If it's on the left of the camera (most common), rotate it clockwise, and the opposite if it's on the right. Keep winding until all resistance disappears. You'll probably hear a click as the film disengages from the take-up spool.
Once you're certain it's fully rewound, you can open the camera back and remove the film.
#8 Develop your film
If you're in Cardiff, I can recommend Express Imaging on City Road to get your film developed. If elsewhere, you can use a service like Analogue Wonderland's lab service, which, if you bought film from them, they probably provided you a box and prepaid postage label for.
There are a few different options when getting your film developed. If you have a flatbed scanner at home then you can just pay for "development" and scan your negatives yourself, but for most beginners it's easier to have the shop/lab scan them for you. This is usually called something like "dev + scan". You can also order prints of your photographs at the same time.
Good luck!
I hope you enjoy shooting your new film camera, and if you have any issues make sure to bring it into me or drop me an email and I'd be more than happy to help out.
And make sure to show me some of your photos!